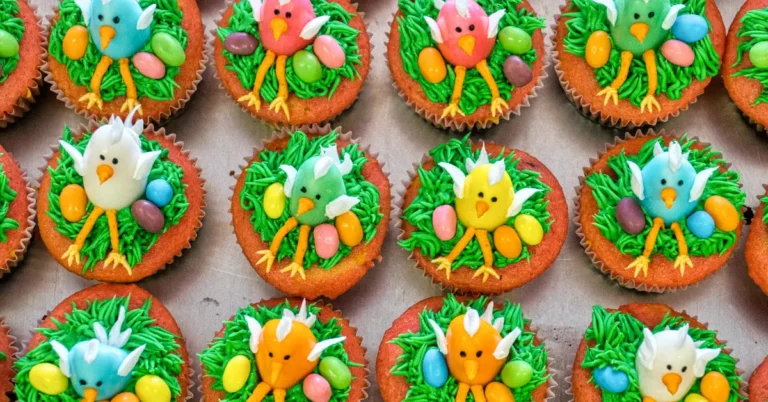
Easter Egg Cookies Recipe
Easter is just around the corner, and what better way to celebrate than with delicious Easter Egg Cookies? These vibrant, fun, and easy-to-make cookies are perfect for your holiday gatherings, whether you’re hosting an Easter brunch or simply indulging in some sweet treats with your family. With colorful icing and festive designs, these cookies are sure to be the highlight of your Easter celebration. In this guide, we’ll walk you through the steps to make the best Easter Egg Cookies that are not only delicious but also Instagram-worthy!
Why You’ll Love Easter Egg Cookies
Easter Egg Cookies are the perfect combination of soft, buttery cookies and colorful, fun decorations. These cookies are ideal for anyone looking to add a creative touch to their Easter festivities. Whether you’re a beginner baker or an experienced pro, this recipe is easy to follow and customizable to suit your preferences.
Here are a few reasons why you’ll love making these cookies:
- Vibrant and Festive: The colorful designs make them a great addition to your Easter table or as a gift.
- Simple to Make: With basic ingredients, this recipe comes together quickly.
- Customizable Designs: Add your own personal twist with different colors, patterns, and toppings.
- Kid-Friendly: Kids love decorating these cookies, making them a fun activity for the whole family.
Key Ingredients for Easter Egg Cookies
Before you get started, make sure you have all the necessary ingredients to create the perfect Easter Egg Cookies.
For the Cookies:
- All-purpose flour: The main base for the dough.
- Baking soda: Helps the cookies rise slightly for a soft texture.
- Salt: Enhances the flavor of the cookies.
- Butter: Gives the cookies their rich, buttery flavor and soft texture.
- Granulated sugar: Sweetens the dough and adds a slight crunch.
- Eggs: Provides structure and moisture to the cookies.
- Vanilla extract: Adds a lovely, warm flavor to the cookies.
- Milk: Helps bring the dough together and softens the texture.
For the Icing and Decoration:
- Powdered sugar: The base of the royal icing for decorating.
- Meringue powder or egg whites: Helps create a stiff, glossy icing that holds its shape.
- Food coloring: To create vibrant colors for decorating.
- Sprinkles or edible glitter (optional): For extra flair.
Step-by-Step Instructions for Easter Egg Cookies
Now, let’s dive into the process of creating these delicious and beautiful cookies. Follow these simple steps to make Easter Egg Cookies that everyone will love!
Step 1: Prepare the Cookie Dough
- In a medium-sized bowl, whisk together the flour, baking soda, and salt. Set aside.
- In a large mixing bowl, cream together the softened butter and granulated sugar until light and fluffy.
- Add the eggs, one at a time, followed by the vanilla extract, and beat until fully combined.
- Gradually add the dry ingredients to the wet mixture, mixing until the dough comes together. You may need to add a little milk to bring the dough to the right consistency (it should be slightly sticky but not wet).
- Divide the dough into two portions, wrap each portion in plastic wrap, and chill in the refrigerator for at least 1 hour. This will make the dough easier to roll out.
Step 2: Roll and Cut the Dough
- Preheat your oven to 350°F (175°C).
- Once the dough has chilled, lightly flour your work surface and roll out the dough to about 1/4-inch thickness.
- Use an Easter egg-shaped cookie cutter to cut out the cookies. You can also use other fun shapes like bunnies or flowers if you prefer.
- Place the cut-out cookies onto a baking sheet lined with parchment paper, spacing them about 2 inches apart.
Step 3: Bake the Cookies
- Bake the cookies in the preheated oven for 8-10 minutes, or until the edges are lightly golden.
- Allow the cookies to cool on the baking sheet for a few minutes before transferring them to a wire rack to cool completely.
Step 4: Make the Royal Icing
- In a large bowl, sift powdered sugar, meringue powder (or egg whites), and water. Whisk until stiff peaks form.
- Divide the icing into separate bowls and add food coloring to each to create a variety of vibrant colors.
- If you prefer a thinner consistency for flooding the cookies, add a few drops of water to the icing until it reaches your desired consistency.
Step 5: Decorate the Cookies
- Once the cookies have completely cooled, begin decorating them with the royal icing.
- Use a piping bag or a small spatula to spread the icing onto the cookies in various designs.
- Add sprinkles, edible glitter, or additional icing details to give the cookies a festive and colorful touch.
- Let the icing dry completely before serving or packaging them.
Egg Cookies Nutrition Table
| Nutrition | (per serving) |
|---|---|
| Calories | 150 kcal |
| Carbohydrates | 22g |
| Protein | 1g |
| Fat | 7g |
| Saturated Fat | 4g |
| Cholesterol | 20mg |
| Sodium | 70mg |
| Fiber | 0g |
| Sugar | 12g |
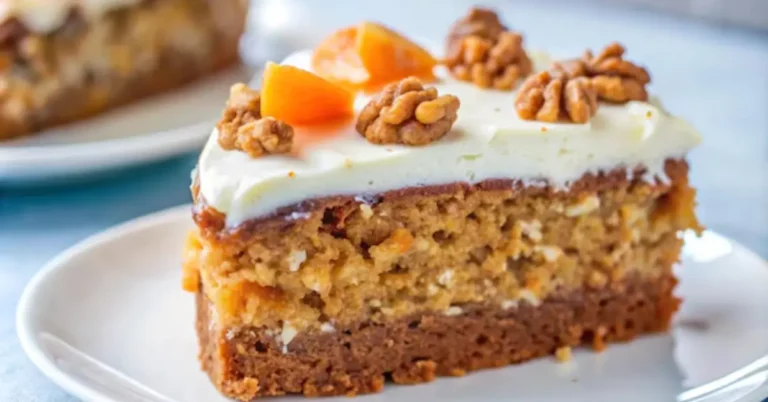
If you loved making these festive Easter Egg Cookies, you might also enjoy our Carrot Cake Recipe for another delicious and flavorful dessert that’s perfect for any occasion. Check it out for a moist and indulgent treat!
Tips for Perfect Easter Egg Cookies
- Chill the dough: Make sure to chill the dough before rolling it out. This will prevent the cookies from spreading too much while baking and help them hold their shape.
- Colorful Icing: Don’t be afraid to get creative with your icing! Use a variety of pastel shades or bright, bold colors to decorate your Easter Egg Cookies.

- Make Ahead: You can prepare the cookies and icing ahead of time and store them in airtight containers for up to 3 days. Decorate them just before serving.
- Add Texture: Try adding texture to your cookies by using a fork to create a pattern on the surface before baking, or pipe fun designs on top of the icing once it’s dry.
- Customize: You can personalize these cookies by using different cookie cutters, adding your favorite toppings, or even writing festive messages with icing.
Storing Your Easter Egg Cookies
To ensure your Easter Egg Cookies stay fresh for as long as possible, store them in an airtight container. They will last for up to 5 days at room temperature. For longer storage, you can freeze the cookies for up to 2 months. Just be sure to freeze them before decorating, and allow them to thaw completely before you add the icing.
Why You Should Make These Easter Egg Cookie
These Easter Egg Cookies are perfect for any springtime celebration. They’re colorful, fun to make, and a great activity for kids and adults alike. Whether you’re hosting an Easter egg hunt or looking for a creative treat to share, these cookies will definitely add a festive touch to your celebrations. The sweet, buttery cookies paired with vibrant royal icing make them a showstopper that’s as beautiful as it is delicious!
Conclusion
This Easter, bring some extra joy to your table with these delightful Easter Egg Cookies! The perfect balance of soft, buttery cookies and colorful, creative decorations will have your guests talking long after the holiday is over. Whether you’re baking for a crowd or making a small batch for your family, this easy recipe is guaranteed to be a hit. Don’t forget to share your creations on Pinterest and inspire others to join in on the fun!